Which side to sew on chevron. Chevron patch on the form
Chevron is an indispensable element of the uniform of employees of special services and organized structures. As in the case of stripes and shoulder straps, there are quite specific requirements for chevron-using organizations for their location on employee clothes. Often, even experienced police officers, military personnel, security guards have questions about the characteristics of placing chevrons on the uniform and their position, because each agency has its own requirements for this element of the form, sometimes changing with time. We will try to understand the basic rules of wearing chevrons and answer the question where to sew chevrons,on the example of the police uniform (new design) and the uniform of the security company employee.
The service uniform of each employee of the Ministry of Internal Affairs and the police officer, without exception, has a chevron universal for all structures - “Russia Ministry of Internal Affairs” - located on the left sleeve. Regulatory documents indicate how sew chevron on police uniform: it must be sewn so that its top point is exactly 8 cm away from the seam on the shoulder above (or the fold of clothes on the shoulder in some types of uniform). The chevron should be positioned strictly vertically and be exactly in the middle of the sleeve, otherwise there is a high probability that it will have to be altered until the correct location is achieved.
Watch out for the seams on the chevron: the seams should be turned inwards, be small and neat, pass along the contour of the chevron. To fix it on the sleeve, it is necessary to use threads of the appropriate color. If you first encountered a question, how to sew police chevrons on the form, pay special attention to the correct location of the chevron: fix it on the top and bottom with pins in the correct position and only then begin to sew.
They have their own chevrons, stripes and security companies, some of them have clear prescriptions regarding their position, some of these rules do not exist, but there are some universal recommendations that should always be followed. If the security organization has its own sleeve chevron with the company’s symbols, it should be located vertically on the left sleeve of the form, being its top point exactly 8 cm from the seam on the shoulder, like a police officer or private security officer. The seams should follow the contour of the chevron and be made with threads of the appropriate color. By following these simple recommendations, you can always correctly sew a chevron on the uniform of a guard.
The patch is a distinction between military and organized structures. Initially, it was about tattoos, then in the Middle Ages began to use chevron stripes, which served as a symbol of belonging in the service. At the same time, the military is constantly faced with the problem of correct chevron stripe on the uniform.
You will need
- Patch, needle, thread, pins, ruler.
Instruction
Before you start to sew a stripe on the jacket, it should be remembered that all stripes have different shapes and sizes. In addition, the chevron can be mounted on different places. Special regulatory documents may indicate the chevron stripe pattern.
Chevron "Russia Ministry of Internal Affairs" according to regulatory documents must be sewn on the left sleeve of uniforms. Chevron should be placed at a distance of 8 cm from the seam on the shoulder or bend to the highest point of the patch.
Stripes showing affiliation to different services and divisions should be sewn on the right sleeve in the center of the pocket located on the sleeve. The rule applies to summer and winter form. On other forms of the form, the chevron is sewn on the right sleeve with an indent of 8 cm from the top seam to the top of the chevron.
First, the distance from the top seam of the sleeve is measured and the patch is placed at the specified distance and the top edge is fixed with a pin.
The bottom edge should be sewn in such a way that when the hand is lowered down, the patch should be placed vertically on the sleeve. Pin the lower edge of the patch with a pin.
Chevron is sewn along the contour with small stitches inside. In this case, the patch should fit snugly to the sleeve.
Textile patches are not only distinctive in various organizations, associations and military structures, but also very popular among bikers in America and Europe. They can be sewn on clothing, hats, jackets, or even easier to stick with the help of an iron, while giving their image a certain personality.
You will need
- - stripe-
- - needle and thread -
- - sewing machine-
- - pins -
- - chalk or soap.
Instruction
Manual mode. If there is a lining in the product that will be sewn on, unpin the lining or sew it with stitches for the time of sewing. Cut off the excess from the patch, but so that around it remains 5-10 mm of the visible part. If you cut it close to the patch, it can dissolve.
Fold the edges of the patch flush and press down with a warm iron. The corners can be trimmed. The patch should look like, it seems to be already sewn. Do not use a hot iron for this. Usually, patches are made of synthetic materials and can be melted on contact with a hot iron.
Attach the patch to the product, fasten it with pins and tack with white thread. After that, try on the jacket with the patch and put it on and make sure that the patch is sewn in the right place and evenly. Later it will simply be impossible to align the curves or change its position.
Sew it clean: with small stitches, sew a patch around the edge. After that, wet the patch with water and once again iron a warm iron to evaporate the water - the patch will become like a glove.
Half machine way. Cut the patch as well as in the previous method and attach it to the place where you want to sew it. Use soap or chalk to mark the beginning and end of the stitching machine stitching. Attach a portion of the patch to the back. Fold the attached portion of the patch around the machine stitching and then sew with your hands. With this method of sewing machine stitch will be completely invisible.
Machine mode. Cut the patch as in the first method. Fold the edges, but not close to the useful part of the patch, but leave 1-2 mm. Sew a patch on the left millimeters with a zigzag stitch so that it does not cover the effective area of the patch. Strike off the stripe with an iron. You can also use the usual longitudinal stitching for sewing, although such a stitch does not prevent the ribbing of the edges of the patch, unlike the seam-zigzag.
note
If, after sewing, the fabric is wrinkling, or the chevron does not turn out to be located in the center of the sleeve and strictly vertically, it is necessary to alter it.
Choose a thread color that matches the color of the fabric.
In this article, we will talk about how to sew a patch. We have made for you a detailed master class with an illustration of each stage. If you were looking for information on sewing the stripes on the form and the rules for their location, then the detailed scheme is in the article. Separate articles are devoted.
We are glad to offer you machine sewing on stripes. We make stripes according to your sketch and sew them to any products, we can also sew ready-made stripes that you will bring to us.
We also have a separate workshop on thermofilm.
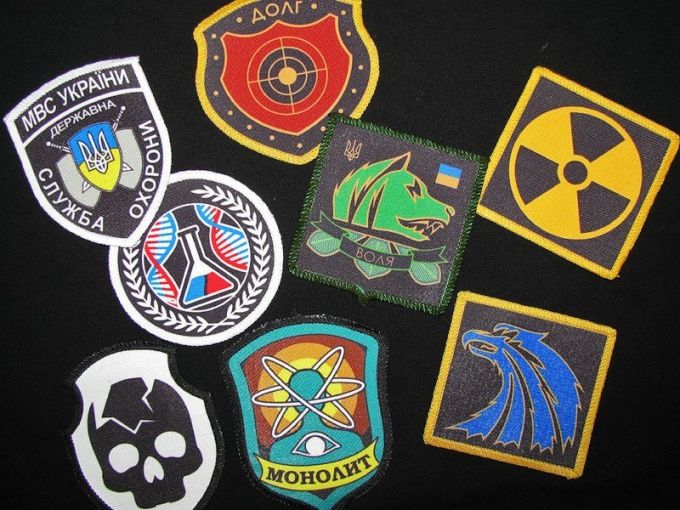
Our stripes
Heart-shaped stripes
School 680 patch for 1 "B" class
Branded patch "Coca Cola"
Soviet badge "Proletarians of all countries, unite!"
How to independently sew a finished patch?
You have a patch, but you do not know how to attach it to clothes. There are two ways: machine and manual. We do not recommend the machine option, unwanted lines may remain on the patch, they will be visible outside and inside out and spoil the whole idea. Our master class is dedicated to the second option, sewing manually. This method is available even to those who have never taken a needle in their hands. In addition, we will tell you about a special secret stitch, which will help make the mount invisible. A little patience and accuracy - and you can sew a stripe to the clothes!
For your convenience, we attach to the instructions how to sew a stripe, step-by-step illustrations. Each picture can be increased, you just need to click on it! As an example, we use a small biker patch with a skull and a sweatshirt.
1. Before sewing the patch
We take a sweatshirt and a patch and pretend where to sew it. To prevent the patch from moving out while we sew it, we recommend fixing it. This can be done using double-sided tape, if there is none, use a pin. If the patch is large and complex, use more attachment points.
You can sew a stripe on any item of clothing: a t-shirt, shirt, jacket, jacket, baseball cap. The patch can also be placed on a bag or backpack, on a scarf or hat, in general, on any suitable surface.
We need to secure the patch so that it doesn’t fidget during the sewing process, then the result will be even and neat. Take a pin or needle, press the patch to the sweatshirt and in one motion make a puncture from the inside out and from the inside to the face. If the patch is thick, it will take an effort to pierce it. Do this carefully so as not to spoil the front part.
I'm afraid to prick a stripe, because I will ruin its front part. There is another old-fashioned old-fashioned way to sew on a straight patch: circle it first with a remnant. Then you will not need to fasten the patch itself, it is enough to sew along the line you have drawn.
2. Thread selection
We also need a needle with a regular sewing thread. It will be good if you use a thread of the same color as the border of the patch. If the color is exotic, and there is no suitable coil in your arsenal - it doesn’t matter, you can sew with white thread, if the edging is light, with black - if it is dark, or pick the closest shade available. We take a double thread - for durability. Tie a knot at the end of the thread.
How to tie a knot?. Unwind the thread with a margin. Thread one end of the thread into the needle and drag until both ends are the same (pull them together and watch. Hold the needle in your right hand, the ends of the thread in your left hand. Wind the tips on the index finger of your left hand (just one turn; not wound yourself with a needle while you wind it in. Slide the needle between the index finger of your left hand and the coil made, pull your finger out of the coil and pull the ends of the thread and the needle at the same time, tightening the knot.
Can I make a bar?. If you can sew, then you can make a lock. If you do not know how, it is better to do with a bundle. In our sewing method, it will still not be visible.
3. Fastening the knot
Go. The knot should be inside so that it is not visible, and it is better to start sewing on the bottom of the patch.
I sew the first time and did not understand anything. Hold the patch with your left hand, hold the needle in the right (if you are left-handed - vice versa. The first photo shows the movement of the needle: slightly stick it into the edging from the inside of the patch and slightly drag it without putting the patch on the front side. Pull the needle further, making a stitch. Narrow stop your movement (see second photo.
4. Start sewing the patch
Now you need to take the next step: stick a needle into the hoodie from the front. How to choose a puncture site? Press the patch over the sweatshirt and take note of the place where the sweatshirt touches the knot. Prick it there.
5. Sewing on a patch
With hidden stitches we sew a fixed patch. Stitches do not need to do very often, a distance of 8-10 mm is fine. We thread the needle through the fabric, making a small stitch on it, then pull it out and drag it through the border of the patch.
I sew the first time and did not understand anything. Now you need to make a stitch. For the first time, to facilitate the task, you can completely pull the needle inside out, peek from the inside of the inside, find the edge of the patch through the sweatshirt, count a few millimeters from the first puncture in the direction of the border and make the second pierce in the opposite direction, from the wrong side on the face. This is called "make a stitch". It is easier and faster to do stitches in one movement, without looking at the inside. In the first photo you see an example of a stitch in one movement: the fabric is punctured from the front side inside out, immediately the second one is punctured, from the inside out to the face, and only then the whole thread is drawn. All punctures are performed in one motion, the needle is constantly kept from the front.
6. Sew a stripe with small stitches.
So that there are no long stretched threads on the inside of your sweatshirt, slip between the stitches inside the border of the patch itself, and sew stitches on things a maximum of 1 mm long, so they will be less noticeable and later there will be no big risk when washing or wearing a thread .
Tacking - 2 stitches with a loop - for reliability, carefully on the edge of the patch. The loop should be tightened into a knot, and the excess thread should be cut off.
![]()
I sew the first time and did not understand anything. With a loop, when you start to do a stitch (pierce the patch and fabric and start pulling the needle from the inside out, you do not fully pull the thread. Do not finish the movement. And by returning the needle from the wrong side to the face, you pass it into the resulting loop and only then end of the thread, you get a knot. Look carefully at the first illustration of step 7. There you can see how the thread forms a loop. Starting position: you are on the front side, you have a needle in your hands, there is a thread in it that comes out of the patch - on the front side. The algorithm of your actions 1. Insert a needle into a patch 2. Push the needle further to pierce the fabric with it 3. Intercept the needle from the wrong side 4. Draw, BUT! Do not tighten the thread! You have a loop - a piece of thread from the front side, which you stitched tightly during the stitches, and now you left it. You hold the needle from the inside out. 5. Stitch the fabric through the needle. 6. Stitch the patch through the needle. 7. Pass the needle through the loop you left, as in the first illustration in step seven. 8. Pull the thread, now tightly, and, thus, tighten the knot.
8. Result of work
Is done. Stripe in place, and we spent only 7 minutes. Not so difficult, is not it?
If some stages caused you difficulties, you can squander the article to the end, at the bottom there will be an opportunity to leave comments through social networks. Ask your question there. We will respond during business hours during the day.
We also offer our sewing services. We can sew your stripes in your products, we can purchase products, we can embroider custom stripes. Contact us!
Sewing on the sewing machine
New Articles
- What is the highest peak of the Ural Mountains
- The most ancient religions in the world
- What continents are washed by the Atlantic Ocean?
- Can I wear jewelry of the deceased?
- Snake, Bowl and Staff: The Origin of Medical Symbols
- Interesting facts about hares
- Names of famous brands in other countries
- Karelo Finnish epic kalevala protagonists
- 17 18 weeks pregnant sensations
- Why do people become so aggressive
Popular articles
- Expression twice in one river, meaning and meaning
- Gusli - musical instruments
- Report: Temperature Scales and Thermometers
- Which side to sew on chevron
- How to draw emblems for school
- Unusual rivers of the world and the rivers of Russia - Rivers with sour water
- Numb of the little finger on the right hand: causes and methods of treatment
- Why development is important for a person
- Constellations from ancient atlases
- What happens at 31 weeks